 Save
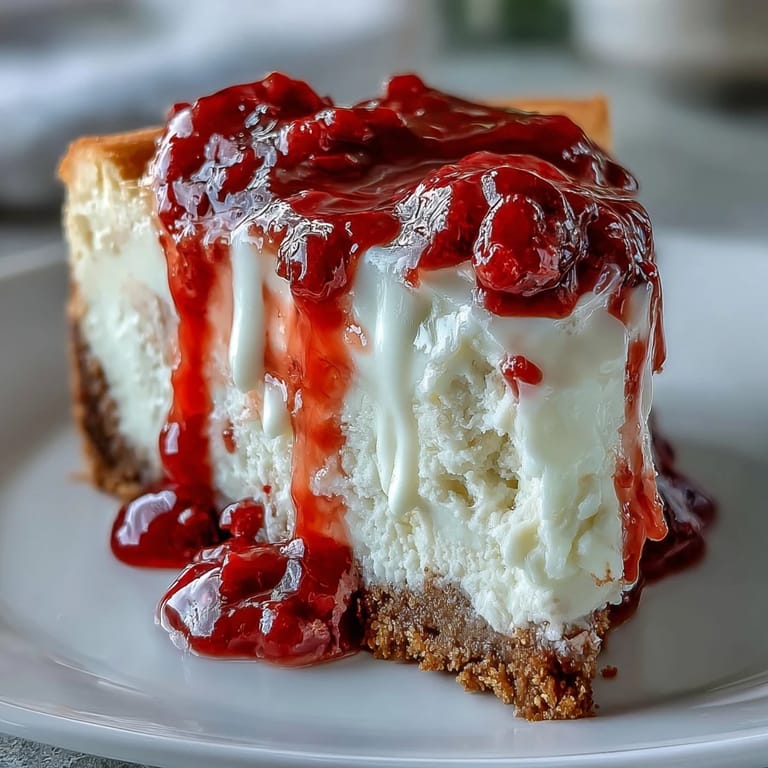
Save The kitchen smelled like burnt sugar and regret the first time I attempted this cheesecake. I had skipped the water bath, convinced it was an unnecessary fuss, and watched through the oven door as a giant crack split the top like a fault line. My sister laughed so hard she nearly cried, but we ate it anyway, scraping raspberries over the damage. That disaster taught me more than any perfect bake ever could.
I made this for my best friend's birthday three years running before she finally asked for the recipe. Each time, she'd close her eyes after the first bite and go quiet, which is how I knew it was working. The third year, she admitted she'd been trying to recreate it at home and couldn't figure out why hers always cracked. I told her about the water bath, and she looked at me like I'd revealed a state secret.
Ingredients
- Graham cracker crumbs: The buttery base that holds everything together; I crush mine in a zip-top bag with a rolling pin when I'm feeling aggressive.
- Granulated sugar (for crust): Just enough sweetness to keep the crust from tasting like cardboard.
- Melted butter: This is what turns crumbs into a cohesive, golden foundation; don't skimp or it'll crumble when you slice.
- Fresh or frozen raspberries: Frozen works just as well and saves you from paying a fortune at the market in winter.
- Granulated sugar (for raspberry filling): Balances the tartness; taste as you go because some berries are sweeter than others.
- Lemon juice: Brightens the raspberry sauce and keeps it from tasting flat.
- White chocolate: The star of the show; use good quality or you'll end up with a waxy, too-sweet mess.
- Cream cheese: Must be softened to room temperature or you'll have lumps no amount of beating will fix.
- Granulated sugar (for batter): Sweetens without overpowering the delicate white chocolate flavor.
- Large eggs: Add them one at a time and barely mix after each; overmixing here is what causes cracks.
- Vanilla extract: A teaspoon is all you need to round out the flavors without competing with the chocolate.
- Sour cream: The secret to that creamy, tangy richness that makes this taste like a fancy bakery version.
- Heavy cream: Thins the batter just enough to swirl beautifully with the raspberry sauce.
- Extra raspberry sauce or fresh berries: For garnish, because presentation matters even when you're serving it to people who've seen you in pajamas.
Tired of Takeout? 🥡
Get 10 meals you can make faster than delivery arrives. Seriously.
One email. No spam. Unsubscribe anytime.
Instructions
- Prep Your Pan:
- Preheat your oven to 325°F and grease a 9-inch springform pan, then line the bottom with parchment paper. This step prevents heartbreak later when you try to remove the cheesecake and it sticks.
- Build the Crust:
- Mix graham cracker crumbs, 1/4 cup sugar, and melted butter in a bowl until it looks like wet sand, then press it firmly into the bottom of the pan. Bake for 8 minutes and let it cool completely while you make the filling.
- Make the Raspberry Swirl:
- Combine raspberries, 2 tablespoons sugar, and lemon juice in a small saucepan and cook over medium heat for 5 to 7 minutes, stirring often until it thickens into a jammy sauce. Strain out the seeds if you want it smooth, then set it aside to cool.
- Melt the White Chocolate:
- Chop your white chocolate and melt it in a heatproof bowl over simmering water or in the microwave in 20-second bursts, stirring between each until it's completely smooth. Let it cool slightly so it doesn't scramble the eggs later.
- Beat the Batter:
- In a large bowl, beat cream cheese and 1 cup sugar until it's smooth and creamy with no lumps, then add eggs one at a time, beating just until each one disappears. Stir in vanilla, sour cream, and heavy cream, then fold in the melted white chocolate until everything is silky.
- Swirl and Layer:
- Pour half the cheesecake batter over your cooled crust, dollop half the raspberry sauce on top, and swirl gently with a knife in a figure-eight motion. Pour the remaining batter over that, add more raspberry sauce, and swirl again without overdoing it.
- Prepare the Water Bath:
- Wrap the outside of your springform pan in two layers of foil to keep water out, then set it in a larger roasting pan. Pour hot water into the roasting pan until it comes halfway up the sides of the springform.
- Bake Low and Slow:
- Slide the whole setup into the oven and bake for 60 to 70 minutes, until the edges are set but the center still has a slight wobble when you gently shake the pan. The residual heat will finish cooking it.
- Cool Gradually:
- Turn off the oven, crack the door open, and let the cheesecake sit inside for 1 hour to cool slowly. Remove it from the water bath, then refrigerate for at least 4 hours or overnight.
- Serve with Flair:
- Run a knife around the edge before releasing the springform, then top with extra raspberry sauce or fresh berries. Dip your knife in hot water and wipe it between cuts for clean, Instagram-worthy slices.
 Save
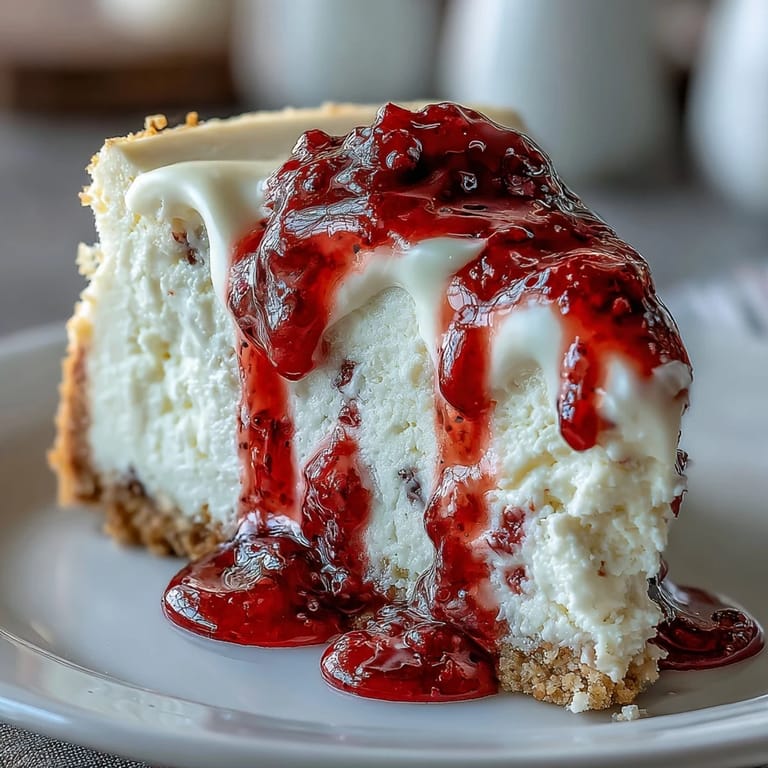
Save There's a moment after you unmold this cheesecake, right before you add the berries, when you realize you've made something that looks like it belongs in a bakery window. My niece once asked if I'd bought it from a fancy store, and I've never felt more proud. It's not just dessert; it's proof that you can make magic happen in your own kitchen with patience and a good recipe.
Choosing Your Raspberries
Fresh raspberries are gorgeous but fragile and expensive, especially out of season. Frozen raspberries work just as well in the sauce and sometimes have better flavor because they're picked at peak ripeness. I always keep a bag in the freezer so I can make this cheesecake on a whim without running to three different stores. Just remember that frozen berries release more liquid, so you might need to cook the sauce a minute or two longer to thicken it properly.
White Chocolate Quality Matters
Not all white chocolate is created equal, and the cheap stuff can taste waxy or overly sweet. Look for brands that list cocoa butter as the first ingredient, not palm oil or other fillers. I learned this the hard way after making a batch that tasted more like vanilla candle wax than dessert. Good white chocolate melts smoothly, tastes creamy, and doesn't leave a weird coating on your tongue.
Storing and Serving Tips
This cheesecake keeps in the fridge for up to five days if you cover it loosely with plastic wrap or store it in an airtight container. The flavors actually deepen after a day or two, so don't be afraid to make it ahead. I've also frozen individual slices wrapped in foil and parchment, then thawed them in the fridge overnight when I needed a quick dessert for unexpected guests.
- Let slices sit at room temperature for 10 minutes before serving so the texture softens and the flavors open up.
- If the top cracks despite your best efforts, pile on extra berries and call it rustic.
- Pair with sparkling wine or Moscato for a celebration, or strong coffee if you're eating it for breakfast like I do.
 Save
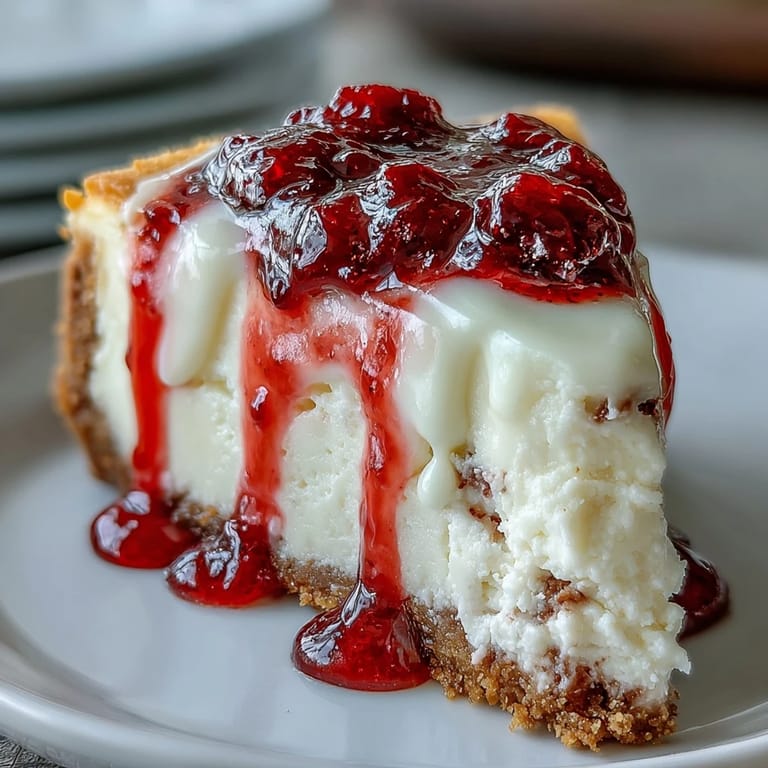
Save Every time I pull this cheesecake from the fridge, I'm reminded that some recipes are worth the wait. The way the white chocolate and raspberries play off each other, the smooth give of the filling against your fork, it all feels like a small triumph worth sharing.
Recipe FAQs
- → Can I use frozen raspberries instead of fresh?
Yes, frozen raspberries work perfectly. They may release more liquid, so cook the sauce a bit longer to thicken properly. Frozen berries are often more tart, so adjust sugar to taste.
- → Why do I need a water bath for baking?
A water bath provides gentle, even heat that prevents cracking and ensures a creamy, smooth texture throughout the cheesecake. The steam also keeps the top from drying out during the long bake time.
- → How do I prevent cracks in my cheesecake?
Avoid overmixing the batter after adding eggs, use a water bath, and allow the cheesecake to cool gradually in the oven with the door cracked. These steps minimize temperature shock that causes cracks.
- → Can I make this ahead of time?
Absolutely. This cheesecake actually tastes better when made a day ahead, allowing flavors to meld. It keeps well refrigerated for up to 5 days when covered properly.
- → What type of white chocolate should I use?
Choose quality white chocolate with cocoa butter as the main fat. Avoid white baking chips or candy melts, as they won't incorporate as smoothly and may affect the texture and flavor.
- → Can I make this gluten-free?
Yes, simply substitute gluten-free graham crackers or cookies for the crust. The filling is naturally gluten-free, so this is an easy adaptation that maintains the same delicious results.