 Save
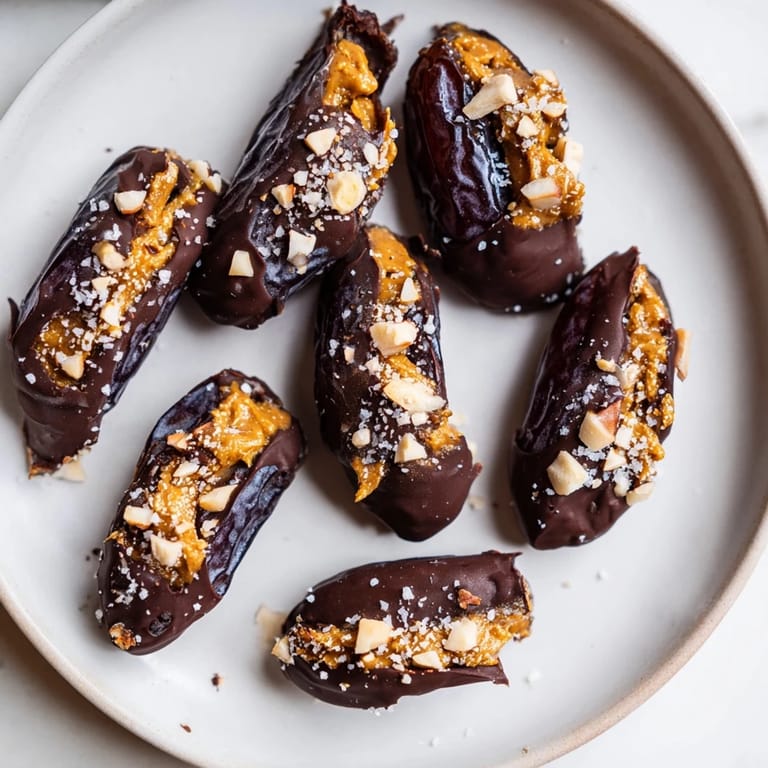
Save I discovered these chocolate date Snickers by accident one afternoon when I had a craving for something sweet but wanted to avoid my usual candy bar run. Standing in my kitchen with a bowl of Medjool dates, a jar of peanut butter, and a bar of dark chocolate, I thought: why not make my own version? Twenty minutes later, I was biting into something that tasted like a sophisticated candy bar—rich, chewy, and so much better than anything wrapped in foil from the vending machine.
My friend Sarah texted asking what I was bringing to her dinner party, and I almost said store-bought cookies until I remembered these were sitting in my fridge. She took one bite and asked for the recipe before dessert was even finished. That's when I realized these weren't just a personal snack anymore—they were the kind of thing people actually remember eating.
Ingredients
- Large Medjool dates, pitted (12): These plump, naturally sweet dates are the backbone of the whole thing—they've got enough substance to hold the filling without falling apart, and their chewiness is exactly what makes this feel like a real candy bar.
- Creamy peanut butter (6 tablespoons): Use the smooth kind for easy spreading; the creaminess balances the richness of the chocolate.
- Roasted unsalted peanuts, roughly chopped (3 tablespoons): The texture here is essential—they add that signature crunch you expect from a Snickers bar.
- Dark chocolate, at least 60% cocoa (200 g): Don't cheap out on the chocolate; the quality matters since it's the outer layer. Anything less than 60% cocoa gets too sweet and loses that sophisticated edge.
- Coconut oil (1 tablespoon, optional): This is my secret for getting a smooth, snappy chocolate shell; without it, the coating can be a bit thick and unforgiving.
- Flaky sea salt (for topping): A pinch of salt against the sweet chocolate creates this beautiful contrast that makes people pause and say, "What is that?"
Tired of Takeout? 🥡
Get 10 meals you can make faster than delivery arrives. Seriously.
One email. No spam. Unsubscribe anytime.
Instructions
- Split and pocket your dates:
- Hold each date gently in your palm and use a sharp knife to slice lengthwise along one side, then carefully work out the pit. You're aiming for a little pocket that will cradle the filling—think of it like opening a tiny door.
- Stuff with peanut butter and crunch:
- Spoon about half a tablespoon of peanut butter into each date, then sprinkle in a few pieces of chopped peanut. Press the date closed gently so everything stays tucked inside but the seam is still visible.
- Set up your chocolate station:
- Line a baking sheet with parchment paper and have it ready within arm's reach. You want to move quickly once the chocolate is melted so it doesn't start setting on the dates.
- Melt chocolate like you mean it:
- Chop your dark chocolate, add the coconut oil if using, and melt in the microwave in 30-second bursts, stirring between each one. This slow approach prevents scorching and keeps the chocolate silky rather than grainy.
- Dip with confidence:
- Using a fork, gently lower each stuffed date into the melted chocolate, turning it to coat all sides. Let the excess drip back into the bowl before placing it on the parchment—a clean coat is prettier than a thick, drippy one.
- Add salt while it's still warm:
- If you're using the flaky sea salt, sprinkle it on immediately after dipping while the chocolate is still slightly tacky. It won't stick if you wait.
- Chill and serve:
- Refrigerate for 10 to 15 minutes until the chocolate sets completely. They're good straight from the fridge, but also fine at room temperature if you want them slightly softer.
 Save
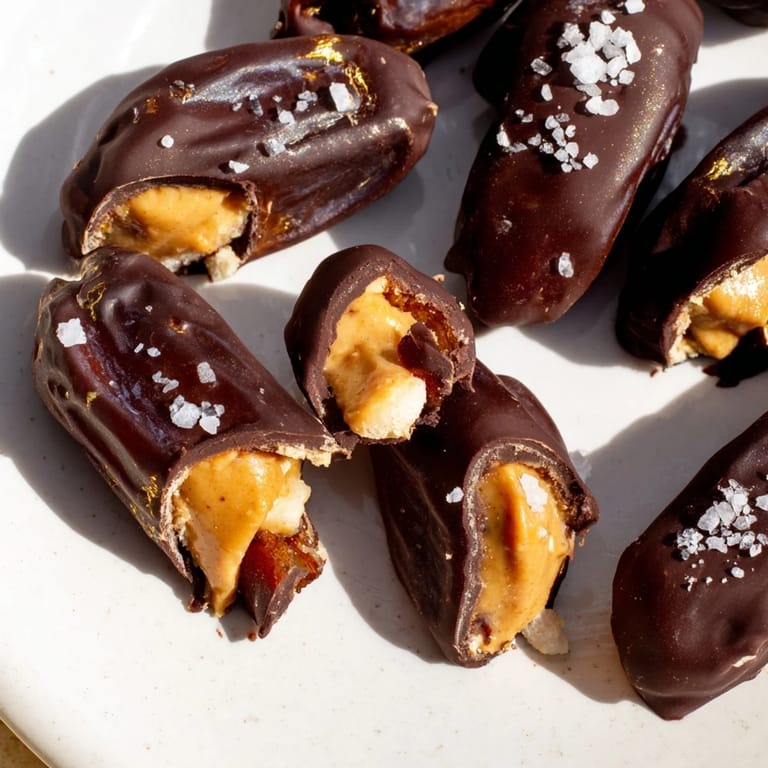
Save There's something almost meditative about dipping each date into chocolate, watching it emerge glossy and transformed. It felt like a tiny act of care, turning something simple into something that felt special enough to give as a gift.
Why This Works Better Than Store-Bought
The reason homemade versions hit different is because you control every element. The dates stay plump and jammy, the peanut butter doesn't taste like stabilizers, and the chocolate actually tastes like chocolate. Store-bought candy bars often taste waxy by comparison, and once you've had the real thing, there's no going back.
Flavor Variations to Explore
After making these a dozen times, I started playing around. Almond butter creates a more delicate flavor, cashew butter adds buttery richness, and sunflower seed butter works beautifully if you're avoiding nuts entirely. I've even tried swapping in chopped dried cranberries or a tiny pinch of chili powder under the chocolate coating. The beauty of this recipe is how forgiving it is—the dates and chocolate are flexible enough to work with whatever you're in the mood for.
Storage and Keeping Them Fresh
Keep these in an airtight container in the refrigerator and they'll stay perfect for up to a week, though mine never last that long. They're best enjoyed cold or at cool room temperature when the chocolate still has that nice snap to it. I've found that pulling them out about five minutes before eating gives you that perfect balance—the chocolate isn't brittle, and the date filling is just slightly softened.
- Store in the fridge in an airtight container to keep the chocolate from picking up other flavors.
- If chocolate starts looking dull or streaky, it's just cocoa butter bloom and totally fine to eat—it just means they've been cold for a while.
- These make incredible gifts because they look and taste way more complicated than the effort involved.
 Save
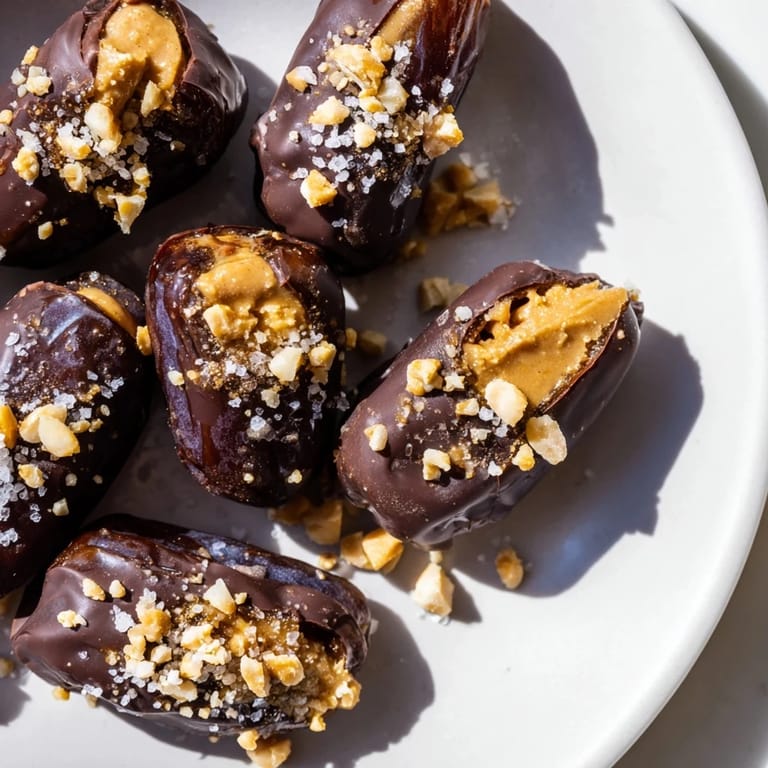
Save These chocolate date Snickers are proof that sometimes the simplest ingredient combinations create the most memorable treats. Make a batch and watch them disappear faster than you'd expect.
Recipe FAQs
- → What kind of dates work best for this treat?
Large Medjool dates are ideal due to their natural sweetness and soft texture, which easily accommodate the filling.
- → Can I substitute peanut butter for other spreads?
Yes, almond or cashew butter can be used for different flavors, while sunflower seed butter suits nut-free preferences.
- → How do I melt the chocolate smoothly?
Melt dark chocolate with a bit of coconut oil in short intervals, stirring frequently to avoid burning and ensure a silky coating.
- → Is chilling necessary after dipping in chocolate?
Chilling for 10–15 minutes helps the chocolate set firmly, creating a glossy and crisp finish.
- → What are some optional toppings for extra flavor?
A light sprinkle of flaky sea salt adds a savory contrast, enhancing the rich chocolate and peanut butter layers.