 Save
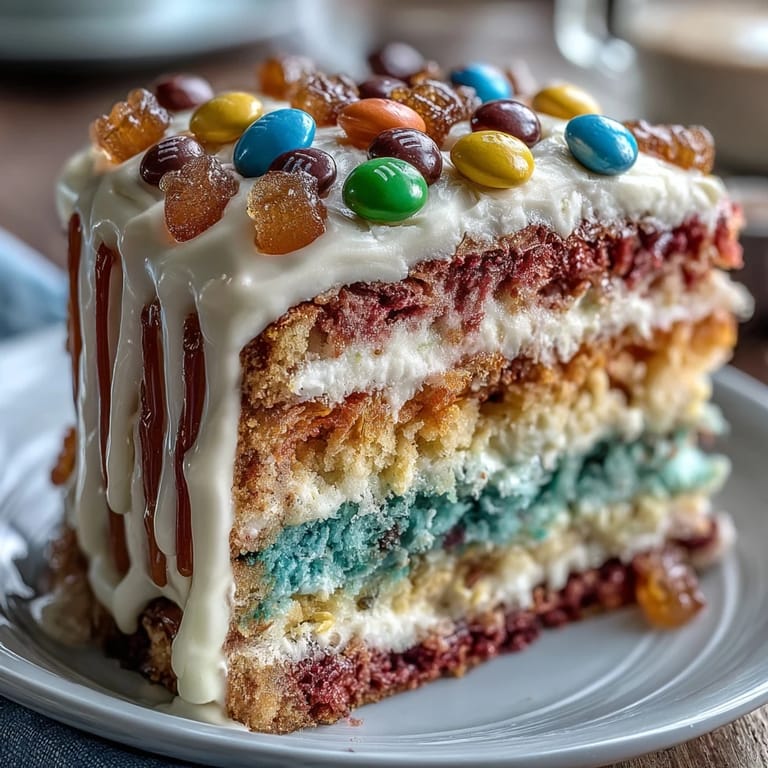
Save My neighbor knocked on the door last spring with frosting-stained hands and the biggest grin, asking if I could help her make something spectacular for her daughter's Cinco de Mayo party. She'd seen a piñata cake online and couldn't stop thinking about it—that moment when you slice into rainbow layers and candy tumbles out like a real piñata breaking open. We spent that afternoon measuring, stirring, and giggling as we mixed six different food colorings, our fingers looking like we'd raided an art studio. That cake became the moment her daughter's eyes lit up wider than I'd ever seen, and I understood then why people fall in love with making cakes that do more than taste good—they create stories.
The first time I made this cake solo, I was terrified about the assembly—would the layers hold? Would the frosting be thick enough? But standing there with all six colorful rounds cooled and ready, I felt something shift from nervousness to excitement. Once I'd scooped out those centers and the cavity filled with gummy bears, M&Ms, and sprinkles, it stopped feeling like a recipe and started feeling like a celebration I was building with my own hands. That's when I realized the real piñata moment happens in the kitchen, not just on the plate.
Ingredients
- All-purpose flour (3 cups): The foundation that needs to be whisked with the leavening agents—don't skip sifting if you want tender, delicate layers that won't crack when you cut them.
- Baking powder and baking soda (2½ tsp and ½ tsp): These work together to lift your cake evenly, so measure them carefully because too much will make the crumb bitter and weak.
- Unsalted butter and sugar (1 cup plus 2 cups): The creaming step takes about three minutes and transforms them into a fluffy cloud—this is where the cake gets its tender structure, so don't rush it.
- Room temperature eggs (4 large): Cold eggs won't incorporate smoothly into the batter and you'll end up with a lumpy texture, so pull them out before you start baking.
- Gel food coloring (six colors): Gel is superior to liquid because it doesn't thin out your batter and makes colors so vibrant you'll think they're almost glowing.
- Whole milk (1¼ cups): Room temperature milk mixes into the batter without shocking it, creating a smoother, more tender crumb than cold milk would.
- Assorted small candies (1½ cups): Stick to mini candies that won't weigh down the layers or create holes—gummy bears, mini M&Ms, and rainbow sprinkles work beautifully together.
- Unsalted butter for frosting (1½ cups): The frosting butter needs to be truly softened, almost at room temperature, so it beats into a silky cloud that spreads without cracking the cake.
- Powdered sugar (5 cups): Sift this before adding it to your frosting or you'll have lumps that no amount of beating will smooth out.
Tired of Takeout? 🥡
Get 10 meals you can make faster than delivery arrives. Seriously.
One email. No spam. Unsubscribe anytime.
Instructions
- Set up your workspace:
- Preheat your oven to 350°F while you grease and line three 8-inch round pans with parchment—the parchment is non-negotiable for getting these delicate layers out cleanly. Having everything ready before you start mixing means you won't be scrambling when the batter is perfect.
- Build your dry mixture:
- Whisk together flour, baking powder, baking soda, and salt in a medium bowl, making sure the leavening agents are evenly distributed throughout. This step prevents dense pockets in your finished cake.
- Create the creamy base:
- Beat softened butter and sugar together for about three minutes until the mixture looks pale, fluffy, and almost doubled in volume—this is where all the lightness comes from. Add eggs one at a time, beating well after each addition, then mix in vanilla until everything is smooth and uniform.
- Alternate dry and wet:
- Add the dry mixture in three parts, alternating with the milk and starting and ending with dry ingredients—this technique keeps the batter tender and prevents overmixing. Mix just until combined after each addition because overmixing develops gluten and makes the cake tough.
- Divide and tint:
- Color your batter:
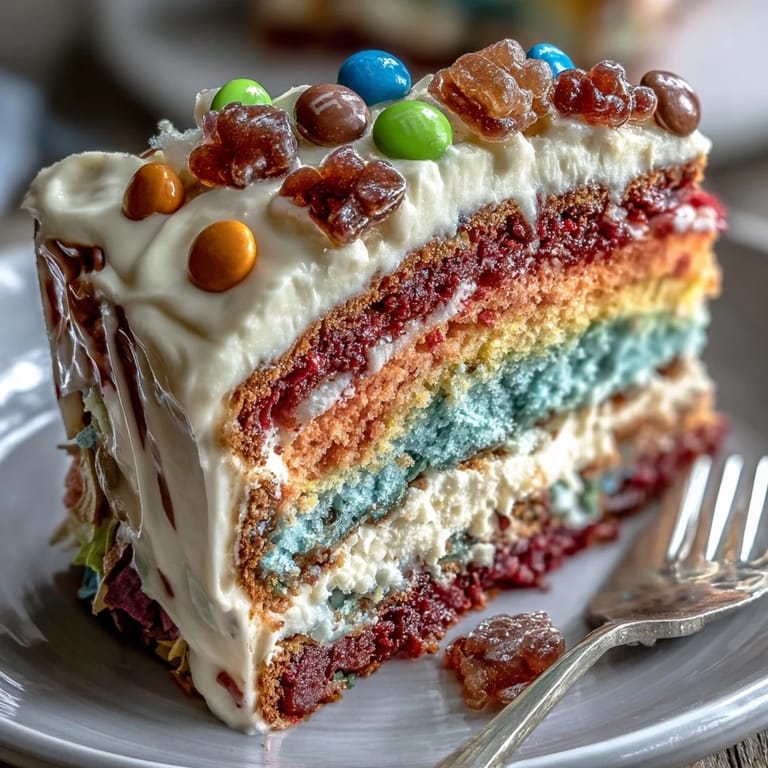
- Divide the batter evenly into six bowls and add a different gel color to each one, stirring gently until each portion is a vibrant red, orange, yellow, green, blue, or purple. The colors will look almost jewel-like when you pour them.
- Bake each layer:
- Pour each colored batter into its own prepared 8-inch pan and smooth the tops, then bake for 15-18 minutes until a toothpick inserted in the center comes out clean. The layers bake faster than you'd expect because they're thin, so keep an eye on them starting around the 12-minute mark.
- Cool with patience:
- Let the layers cool in their pans for ten minutes so they set slightly, then turn them out onto wire racks to cool completely—this prevents them from breaking apart when you handle them later. Completely cooled layers are essential for the next steps.
- Create the piñata cavity:
- Once the layers are cool, use a 3-inch round cutter to carefully press out a hole from the center of four of the six layers, leaving the top and bottom layers whole. Work gently so the surrounding cake doesn't crack or crumble.
- Make your frosting:
- Beat softened butter until creamy, then gradually add the sifted powdered sugar in batches, alternating with milk, vanilla, and a pinch of salt. Beat until the frosting is smooth, fluffy, and light enough to spread without tearing the delicate cake layers.
- Build the cake tower:
- Place the purple whole layer on your serving plate, spread a thin layer of frosting, then stack the first cut-out layer and frost lightly—repeat this rhythm with all four cut-out layers so they stay stable. Think of it like building a sturdy stack where each layer is held in place.
- Fill with surprise:
- Pour all your assorted candies into the center cavity you've created, filling it generously but not so much that it spills when you add the final layer. Watch as your piñata comes to life right before your eyes.
- Crown your creation:
- Place the final whole cake layer on top, then frost the entire outside and top generously with the remaining frosting. Decorate however your heart desires—colored frosting swirls, sprinkles, festive flags, anything that makes you smile.
- Chill and reveal:
- Refrigerate the finished cake for at least 30 minutes so the frosting sets and the layers are easier to slice cleanly. When you cut into it, that moment when the candies start cascading out is pure magic.
 Save
Save Years after that first party, my neighbor still texts me photos of her daughter making this cake with her own friends, now teenagers rolling their eyes at their mom's excitement but secretly thrilled about the candy surprise. There's something about a cake that delivers a moment of pure wonder—where the ordinary act of slicing into dessert becomes an event worth remembering and retelling.
The Art of Layering Without Fear
Stacking six delicate cake layers sounds intimidating until you realize that frosting is actually your friend—it acts as edible glue that holds everything together. The key is spreading each layer thin but evenly, which gives you enough grip between layers without creating frosting-heavy cake. If a layer shifts slightly, don't panic; a little extra frosting around the edges hides small imperfections and actually makes the cake more stable. I learned this the hard way when my second layer went slightly sideways, but the extra frosting I added to correct it ended up making the whole thing surprisingly structurally sound.
Choosing Your Candy Piñata
The candies you choose become part of the story your cake tells, so think about what will delight the people eating it. Mini M&Ms add color and crunch, gummy bears bring chewiness, and rainbow sprinkles tie everything back to the festive spirit. Avoid anything large, super sticky, or with extremely hard shells because these can be difficult to bite through and can even crack teeth. I've found that the best piñata fillings are a mix of textures and colors, creating that moment of surprise that feels genuinely special instead of random.
Frosting Secrets That Make the Difference
The difference between frosting that spreads beautifully and frosting that tears your cake comes down to temperature and technique. Your butter needs to be soft enough that your finger leaves an impression, but not so soft that it's greasy—somewhere around room temperature but slightly cool. Adding the powdered sugar gradually while the mixer is running prevents you from ending up with a grainy mess, and the alternating additions of milk keep the frosting from becoming too stiff. Here's what transforms good frosting into frosting people actually compliment you on:
- Sift your powdered sugar before adding it because lumps in frosting are impossible to beat out once they're in there.
- If your frosting breaks or separates, add a tablespoon of milk and beat it for a minute—it almost always comes back together.
- Save a little frosting before you add the full amount of powdered sugar so you have a backup if you need to adjust the consistency.
 Save
Save This cake is the kind of recipe that reminds you why you love cooking—not because it's complicated or impressive in a pretentious way, but because it creates joy in the most straightforward, honest manner. Slice into those rainbow layers with your people gathered around, watch the candies tumble out, and know that you made something that's both delicious and genuinely delightful.
Recipe FAQs
- → How do I achieve the vibrant colors in the layers?
Use gel food coloring to tint each portion of batter separately before baking to get bright, vivid layers.
- → What candies work best for the hidden center?
Small candies like mini M&Ms, rainbow sprinkles, and gummy bears fit well and create a colorful surprise without melting.
- → Can I prepare the layers in advance?
Yes, bake the layers ahead and chill them well. Store tightly covered to maintain moisture before assembling.
- → How do I cut the center holes cleanly?
Use a 3-inch round cutter to remove centers from select layers ensuring consistent cavity size for the candy filling.
- → What’s the best way to slice and serve the cake?
Chill the assembled cake for at least 30 minutes to firm the frosting and filling, enabling clean, neat slices that reveal the candy core.